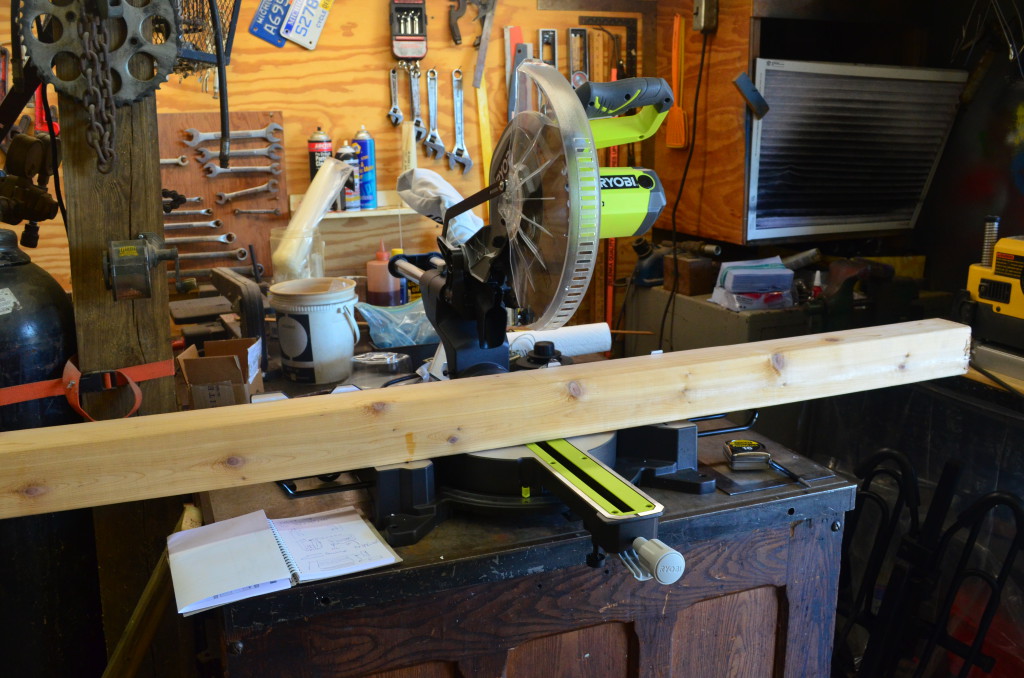
Working on your house? Building furniture? Working with wood requires a saw, and there are many to choose from, all with different uses and abilities. The RYOBI 12″ Sliding Miter Saw saw covers a wide gamut of needs and can find a place in the smallest and largest workshops.
Ryobi has been making quality tools for professionals and home workshops for years. From drills bits to lawnmowers they can meet just about every tool need in your shop (and generators for out of shop work!). Recently they let Busted Wallet try out the Ryobi 12” sliding miter saw and here is what we discovered:
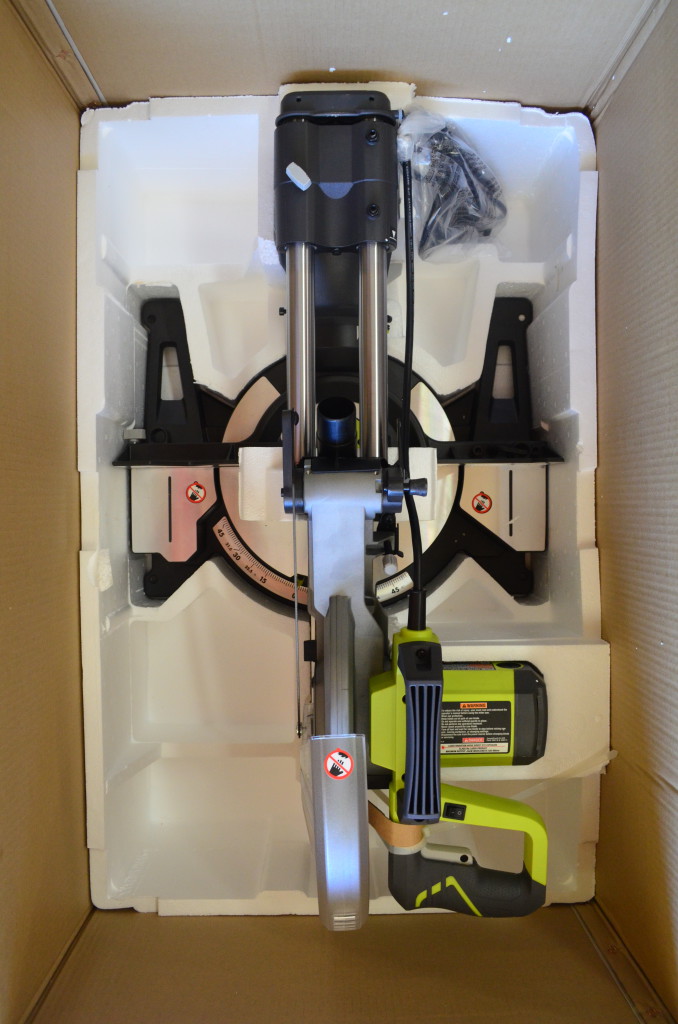 What’s in the Box:
- The Ryobi 12” sliding (compound) miter saw.
- 2 extension bars to extend work area
- 40 tooth carbide tipped, general purpose, blade (pre-installed)
- Clamp
- Dust bag
- Blade wrench
- Manual (view online)
Specs:
- Laser line for blade line up with cut marks, mounted off the blade and adjustable, powered by the saw, not batteries.
- At 0° a 13.5” cut width capacity
- At 0° a 4” cut height capacity
- At 45° a 9.5” cut width capacity
- 15 amp motor, 4000 rpm max
- Positive miter stops at 0°, 15°, 22.5°, 31.6° and 45° left & right
- Just under 27 lbs.
[divider]Ryobi 12” Sliding Miter Saw Review Breakdown[/divider]
Setup and Build:
The saw is well packed in Styrofoam and unpacks easily with a second person. It’s snug, so it helps to have a second person either help remove the saw from the box, or hold the box down while you lift out the 27lbs of metal and machine. There is a carry/lift handle well placed dead-center on top of the saw.
The work piece support wings attach from the underside with one screw each, and while you can do this yourself, keep that second person around for it. You don’t really want to balance 27lbs of sharp saw teeth by yourself while trying to put in a small screws. The front of the saw has an adjustable foot under the miter lock that at first I thought was just ‘nice’, but realize that it was really important once I tried sliding the saw head forward. There is a lot of weight to the head and having that foot adjusted and locked down isn’t just ‘nice’ it is a necessity.
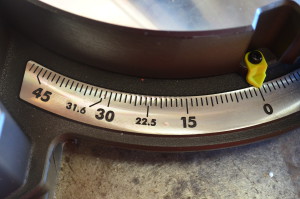
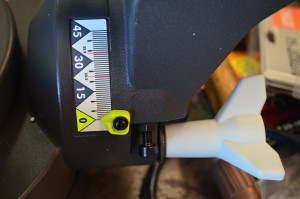
 The saw has a lock to keep the blade down, and another to keep the blade head from moving forward. And also a miter lock for controlling the angle of the blade. I checked the blade for square when I got it and it was already lined up for me. There are adjustments that can be made if it is off. But one thing I noticed is that if it is off for miter and you have to adjust it, then the positive stops that are ground into the metal won’t be right for you either. It isn’t a problem as long as your saw is square like mine was, but check it when unpacking. For the bevel (the compound of a compound miter cut) the adjustment has a positive stop at zero, and you can reset zero by a few degrees if needed with an arrow held down by a screw which is a good design.
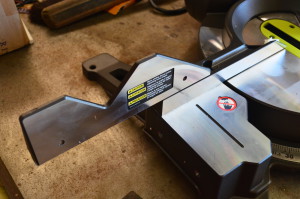
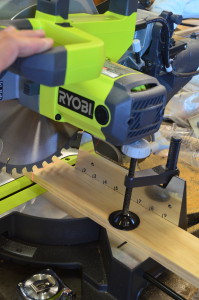
The left work piece wing has the ability (and need) to slide the top half further to the left (as shown above). I say need, because if you do a bevel cut you’ll cut through the fence if you don’t move it. I had a friend do that once, and ever since I just keep mine positioned to the left.
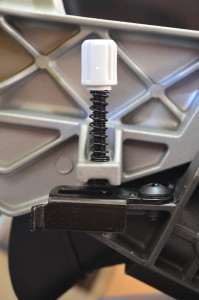
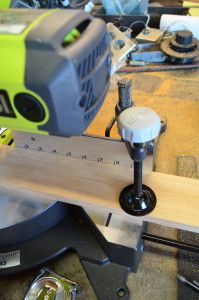
And there is a surprise lock: the dado lock (the funky spring loaded screw pictured above). Yep. I’m sure they call it something more clinical like ‘blade depth control, but ‘dado lock’ sounds cooler to me. You can set the blade depth with this special lock on the right hand side behind the motor, what’s more, there is a lever that engages the lock or not, so you can set a dado depth, use it, then go back to miter cuts and when you return to dado cutting? Boom, it’s already set from last time. You’ll need to space your work out from the fence 2.25″ to create even depth of cut on your datos, but in my opinion this is a really cool option and I can’t wait to use it. I’ve avoided datos on my table saw because I don’t have a dato blade and I don’t like the not seeing the cut I’m making. I can’t think of an easier way to cut datos without a correctly setup table saw.
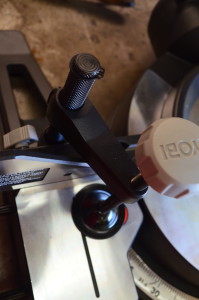
There are holes behind the fence for the clamp on both the left and right sides of the saw head. At first I didn’t like the clamp, it is a knurled rod and doesn’t look like it would be that secure in the hole, but after using it, I liked it and it works as good as any other clamp I’ve used. I’ll note only that it doesn’t work great in the right-side hole, if you put it where you think you should, it gets in the way of the saw head when you bring it down, so you have to swing it over the high spot on the right side of the fence. To me, that’s poor planning. You can hold a piece of wood on the left with your left hand, and bring the saw head down with your right hand, this means you need to clamp on the right. But the clamp works a lot better on the left. I’ll say it isn’t just awkward to hold the wood on the right and cut with your left hand, it is downright dangerous and I don’t advise it.
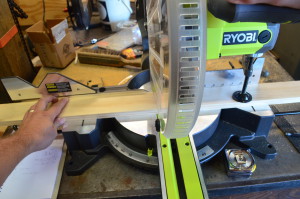
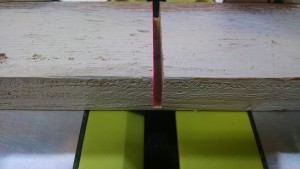
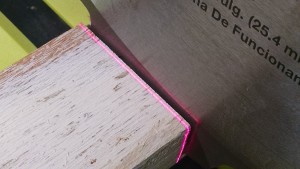
The laser that lines up your blade to your cut mark on the wood is powered by the saw, not batteries, so it isn’t going to run out at a bad time. It is also mounted on the saw head and isn’t part of the blade locking washer. This is good and bad, good because it is adjustable with a skew adjustment to make it parallel with the blade. Mine was lined up with my blade for cutting, but if yours isn’t, There is no adjustment for moving the laser line closer to, or farther from, the cut. At first I didn’t think mine lined up because when I checked it, I had the blade down against the work piece, but it does line up. What’s the issue? Well, as you can see by the photos above, the line moves to the left as you bring the saw down. When the saw head is fully up my laser is lined up, but when I bring it down, it moves to the left. I have to trust it will cut where the line was, and not where the line moves to. It works, but that makes it a bit annoying because I can’t cut a board twice to make it longer and I have trust issues with power equipment sometimes. I’ve read other accounts online with having a problem lining up the laser in different ways. You’ll want to check yours and really work that skew adjustment with a square until you know it is right or isn’t. I’ve found most laser alignments to have similar problem, so it isn’t unique to this saw, but it is a disappointment.
Power and cutting:
15 AMP motor, 13.5” cutting width, 4” cutting height but I wouldn’t try to cut a 4×13.5 beam. You could, but it might crush you trying to get it up on the saw. The manual states nominal cutting sizes of 4×6 and 2×14 as the max cutting sizes, that’s because nominal isn’t actual. A 4×4 is 3.5×3.5 and a 2×14 is 1.75x 13.5. I measured the saw capacity to be an actual width of 13.5” and an actual height of 4”. The manual also states that for cutting ¾” baseboard against the fence, the max cutting height is 5.5”.
Ease of Use:
This saw is a beast and for what it does, comparatively small. My father has a 10” rip saw he bought years ago that takes up a ton of room and isn’t portable. I’ve got a 10” compound miter saw (with no slide) that I consider compact and very portable. This is more portable than my father’s rip saw, or say, a table saw, but I feel once you have it setup up, you aren’t going to want to move it all the time. The carry handle is well placed to pick the saw up, but I wouldn’t want to carry this across a job site on my own. This is a two person lift in my opinion, because of weight and bulkiness, and sharp pointy teeth that can cut you up. That and you don’t want to risk dropping this and knocking something out of alignment. Once there, it’ll do the job and I think that the weight/awkward carry is just a problem of this type of tool. It isn’t meant for moving day to day, although you could if you wanted to I suppose.
The “D” handle is nice, and compared to my 10” saw from another maker, I like the Ryobi better. It is a smooth pull down, and the action on pulling the saw forward is smooth as well. I also like that I don’t have to slide back through my work, I can lift the blade and slide it back as to not risk nicking the wood with the blade while it slows down.
When you engage the trigger the saw leaps a bit but not uncontrollably or unexpectedly. The blade guard reminds you well to keep your hands, arms and face away from the blade and looks like it does an adequate job of protecting all the way down with your cut without getting in the way of the cut. It won’t stop you from getting to the blade if you really try, but I did brush it lightly once while moving too fast and I’m glad it was there.
The dust bag does a good job at collecting dust, but is too small for practical use. You’re cutting with a 12” blade!
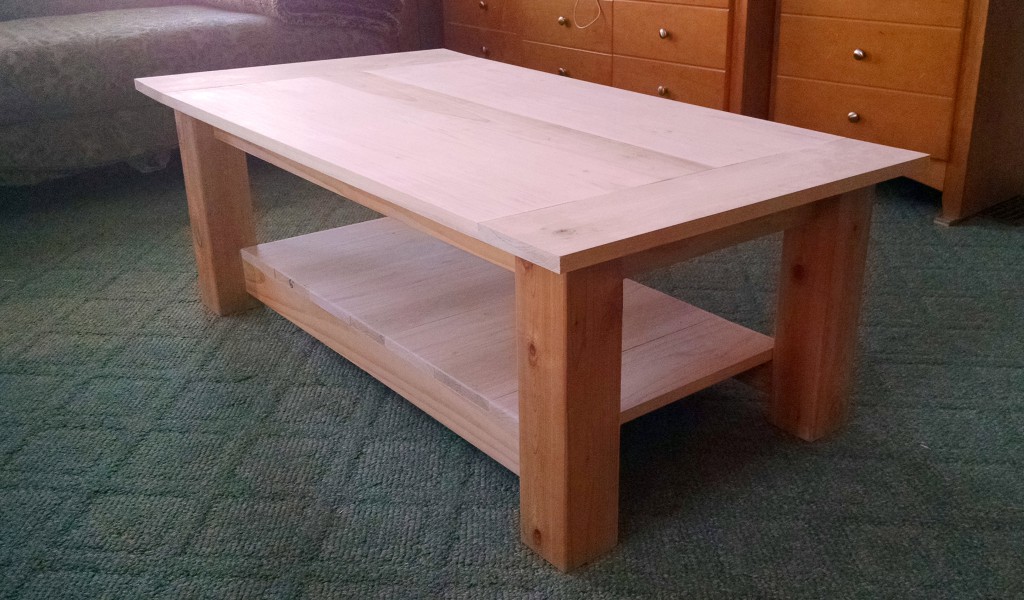
 To test the saw I built a table and was cutting 1×6 poplar for the top boards, something a 10” saw can’t do with-out flipping over the piece of wood, and 4x4s for the legs, something my 10” also can’t do. Cutting more wood = more saw dust. Going to cut a few 2x4s? No problem. Going to do dado cutting or 4x4s all day? You’ll need to hook up the vacuum. The dust port is a standard 1.5” connection so they make that easy.
The manual and website talk about an electric brake on the saw, but I haven’t noticed it. The blade spins for 4 to 4.5 seconds (I timed it) after you let go of the trigger. Maybe that’s what they’re talking about and I’m just used to it on all my saws so I don’t think it is that quick. I guess I was expecting it to stop in 1-2 seconds.
Negatives:
As mentioned above…
- The laser adjustment/placement moving as the saw head comes down.
- The size of the dust bag – minor issue, fixed with a vacuum.
- Clamping location/fence on the right side.
- The type of adjustment for the miter cut will render the positive stops useless if you need to adjust it at all.
- Attachment of the extension wings being secured on the bottom, it would be nice to have the screws that hold them down enter from the front through the frame. Then you wouldn’t need to tilt or lift the saw to remove or attach them.
None of these are deal breakers for me, even at $299, but they were all stand-outs to me the first time I used the saw.
Value:
At $299 I don’t think you’ll find a better built 12” compound miter saw, much less, one with a slide for wider boards. I’ve lived with and used a non-sliding 10” saw for 14 years and I’ve gotten all my projects done, but I’ve had to be more creative with how I did certain things, or accept certain limitations. In building my table, I didn’t just purposely use larger lumber, I wanted to use larger lumber from the get-go in the design stage (I’ve spent too much time on pinterest). None of these cuts would have been possible on my 10” non-sliding version. If you are going to buy a compound miter saw, and if you are putting together a workshop, you are going to buy one eventually, I really think that this should be on the top of your list to check out. The negatives I found were not anywhere close to a deal breaker for me. It is bigger than my 10″ non-sliding compound miter saw, but I say make the room.
The only other improvement I can think to make is to get a finer toothed blade for it. The blade it comes with is fine for framing, but it isn’t super clean on finish work and I don’t want to tape up all of my cuts before I make them to prevent splintering. It worked for the table, but a finer tooth blade will reduce sanding in the future. If I was using this on a job site I’d stick with the stock blade, but I have don’t have to do that in my workshop.
Buy Now: $299 or learn more at: RyobiTools.com
- HUGE cutting capacity
- Powerful
- Unexpected Datos!
- Right side clamp
- Size of the dust bag

Good report except you say it is under 27 pounds. It weighs just under 40 pounds
I agree with the commenter above — the weight is incorrect. Other that that, great review. I’m fairly new to woodworking, and until recently I was using an old saw that used to belong to my uncle. Long story short, it’s no longer usable (although it worked like a charm in its day), and now I’m looking for a good miter to buy that won’t break the bank. This is one of the lines I’m looking at. I’ve taken a look at some other sites for more ideas – Carve Your Creation has a few interesting picks, but I felt their reviews could have been more in-depth. Do you have miter saw recommendations for 2018?
Very disappointed, I returned mine back to the store where purchased, First project required me to cut 1 x 12 the sliding feature would not make a straight a cut, from start to finish it was a heavy 1/16 out of being square (not good for making cabinets). Spoke with Tech support they recommended adjusting the back fence. I tried that also clamped the saw down to my work bench to eliminate additional movement all failed….so it was returned like I said very disappointed with the tool.
Great deal until the brake stops working and the guard breaks, which based on the two of these saws I have tried now, happens in less than a month. Then you’re faced with TWO MONTHS of waiting for Ryobi’s service center to fix it
I have enjoyed using wood for projects for decades. However, I have rarely read such a clear, concise and useful brief on this subject. Well done and Thank you!
I would say this is one of the best article I’ve read.
It was nailed by you totally from beginning to end.
To write this you may have worked for study.
King regards,
Dinesen Raahauge