I’ve been cooking in the outdoors since I was 11 years old as a scout. Every outdoor trek is different, and each has its own cooking needs. Backpacking requires a light stove. Group camping requires a stove that can turn out large quantities of food. Camp Chef has been making stoves since the 1990s. They had a goal to build a better stove and they succeeded. When an opportunity to try out their Explorer Two Burner Stove AND the Professional Flat Top Griddle came up we jumped at the chance and here is what we discovered.
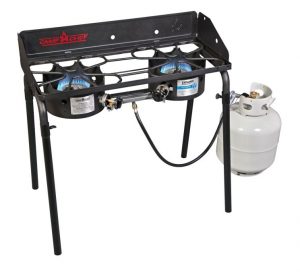 What’s in the box:
- Explorer Two Burner Stove (EX60LW)
- 4 detachable legs
- 3-sided wind screen
- Organizer bag for the legs and windscreen
Features:
- 14” 2 burner stove
- 3 ft. hose and regulator
- Compatible with most 14 in. Camp Chef accessories
- Two 30,000 BTUs/Hr. cast-aluminum burners
- Appliance-style temperature controls
- Cooking Dimensions: 14 in. x 32 in.
- Stove Cooking Area: 448 sq. in.
- Stove Height: 29 in.
- Stove Weight: 30.5 lbs.
- One Year Warranty
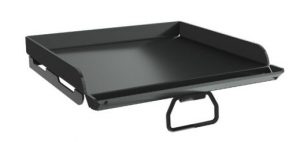 Professional Flat Top Griddle
- 15”x16”x2-5/8” Overall size
- 14”x16” Cooking area
- 1.5” high sides.
- Drip edge
- Wire can holder
[divider]Camp Chef Explorer Two Burner Stove Review Breakdown[/divider]
 Design
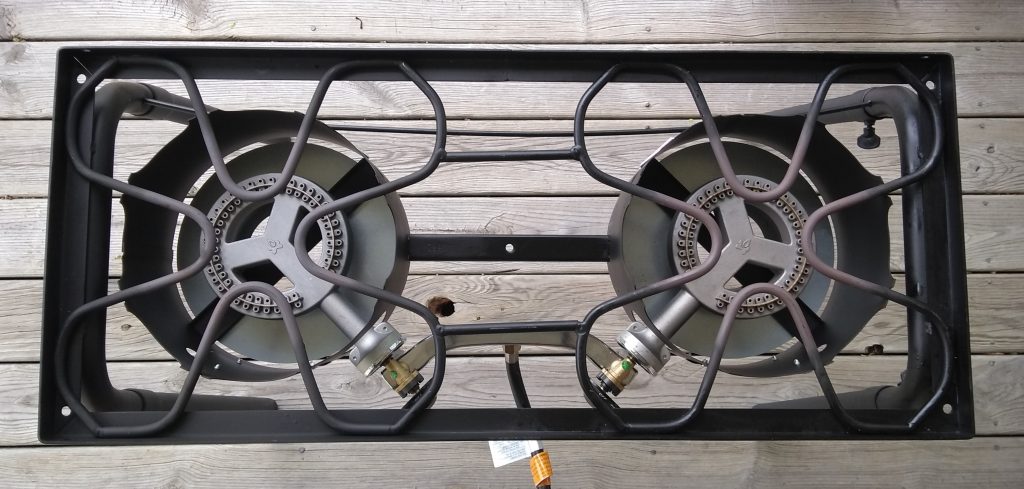
 The Explorer Two Burner Stove is in the middle/bottom of the Camp Chef Stove line that has legs. The bottom being the Pioneer, which is basically the Explorer without a windscreen, the top being the 16” stoves and the stainless steel ones. The design is for function first, strength and quality, over looks, but I think strength looks reassuring. You know looking at this stove that you can put a giant pot on to boil, or a dutch oven and cast iron pans and you aren’t going to damage it. It’s built tough. They don’t waste metal on covers or flaps or on needless chrome. Sure it’s not shiny, but it also doesn’t have places that collect dropped food either making it easier to clean because there is less to clean.
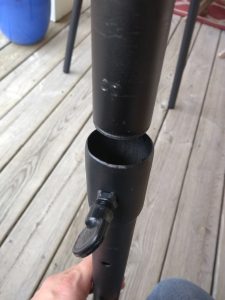
The legs are strong and provide the right height for cooking for an adult, but also for a youth. It’s lower than your stove top at home, but not so low it caused me problems.
Nothing is perfect. The two things that I knock the Explorer Two Burner Stove down for are not including the leg levelers, of all the accessories, they are a must have. Second, the storage bag the legs and wind screen came it. It’s useless for the windscreen at least. and I can’t see it lasting for the legs on their own, it is just too thin. If I could suggest an improvement, other than a canvas bag for the legs, it would be to put one more hinge on the windscreen so it folded in exact middle of the long back section, and maybe something that secured it together, but I guess I could get a Velcro strap or large rubber band at that point.
Setup
At 30.5 lbs this is a base camp and tailgating stove. This is a stove you set up near a vehicle/trailer. When we reviewed the Camp Chef Deluxe Camping Oven, the same was true, but that you can operate off of a 1lb propane bottle. This requires a 20lb tank.
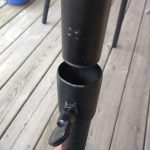
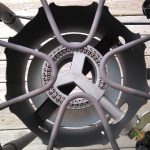
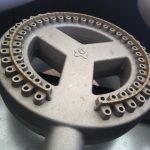
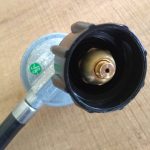
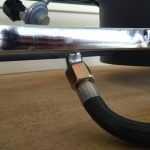
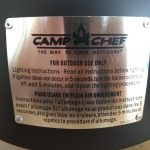
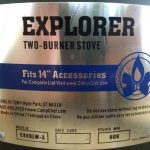
Without the legs, the Explorer Two Burner Stove can sit on a solid surface and has feet but this is for storage only, DO NOT use it this way. It says it right on the front, ‘do not use stove with out leg extensions” The burners throw off a lot of heat and we noticed the decals on the back of the heat shields peeling off. Speaking of legs, spend the $19.49 and get a set of leg levelers. They adjust fast and make a real difference. A stable stove is a safer stove. The open design has two benefits, first any food you drop through falls to the ground so you don’t have to clean it off the bottom of the stove. Second, it gives you a lot of places to grab the stove and carry it making it easy to set up. Other stoves that I’ve used with legs are best described as slippery and awkward to set up because the legs screw in, with the Explorer, you insert the legs and tighten a thumb screw. Easy and fast.
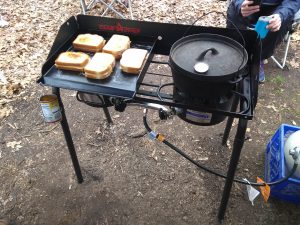 The regulator and hose are already attached to the stove and has a common large thread connection (Type 1) for a direct hook up to a propane tank. This isn’t made to attach to a staff or tree, so plan your tanks accordingly. For this test I brought a Y adapter to hook up both this stove and the Camp Chef oven for warming some things. Normally we have a staff with a lantern, but instead we used headlamps. At first I found this annoying, but it’s not, it’s just not what I’m used to and it worked out fine. The hose is 3’ long which gets the tank out of your way but doesn’t create a trip hazard.
The last part to go on is the windscreen. It’s slides down on the edges of the stove and helps define the cooking surface, I’m not sure it is really ‘required’ but it looks nice. We had very little wind while cooking all weekend.
Ease of Use
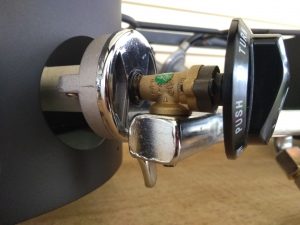 Start up is basic, light a long lighter or long match, and turn on the gas. Each burner needs to be lit on its own. There are side holes that you can light through if you have a pot on the stove already. Camp Chef sells an igniter kit ($13.99) if you want to go matchless. You’ll need one for each burner. We’ve always got matches/lighters around so this isn’t a concern for us and I prefer having one less thing to break, I’m o.k. That it wasn’t included, but it’s nice that it is an option.
They say that the controls are appliance style and I agree, push to turn, then ‘warm, High, Medium, Low’. This is almost their most basic stove, only 1 step up from the Pioneer, the controls are almost under the stove at an angle pointed to the middle. While the more expensive stoves have them pointed to the front. this design is better for several reasons, it’s easy to see both at once, they are protected from the front during use AND for storage. You won’t be worried about a valve getting knocked, bent, or turned accidentally during cooking..
Once on, it’s a camp stove right? No.
We have never used a camp stove with the range of heat this had. We’ve used hot stoves with no low, and warm stoves with no high. But this control and burner are amazing. The low it is capable of is so much lower than I expected for something this size, and the high obviously is insane, but what impressed us even more is the control. There are a lot of durable camp stoves, but many seem like there is no low and the movement from low to high is a quarter turn. It’s hard to finesse the right heat. Or worse, once set, the valve creeps up because of the pressure. Not so with these controls. Low is low. Medium is medium. High is the blazes of hell and damnation. They are infinitely variable and stay where you put them. It is the most like using an indoor stove top in the outdoors we have ever experienced.
Question: So, what do you test cook when you get a new test stove and griddle?
Answer: Everything.
Maybe you heard, ‘we cooked a lot of food’. What we said was ‘We Cooked Everything’. Once we knew the Explorer Two Burner Stove was on the way I was looking at buying the Reversible Grill Griddle that Camp Chef sells that fits the stove. I’m glad I waited, and I’m glad they sent the professional griddle to test because it completely changed my mind about griddles. What’s the big change? Grease management. The Reversible Grill Griddle is fine but being reversible, it’s got a small area at the front that collects the grease, that’s fine for 2-3 people’s worth of bacon, but with a stove like this you aren’t cooking for just 2 or 3.
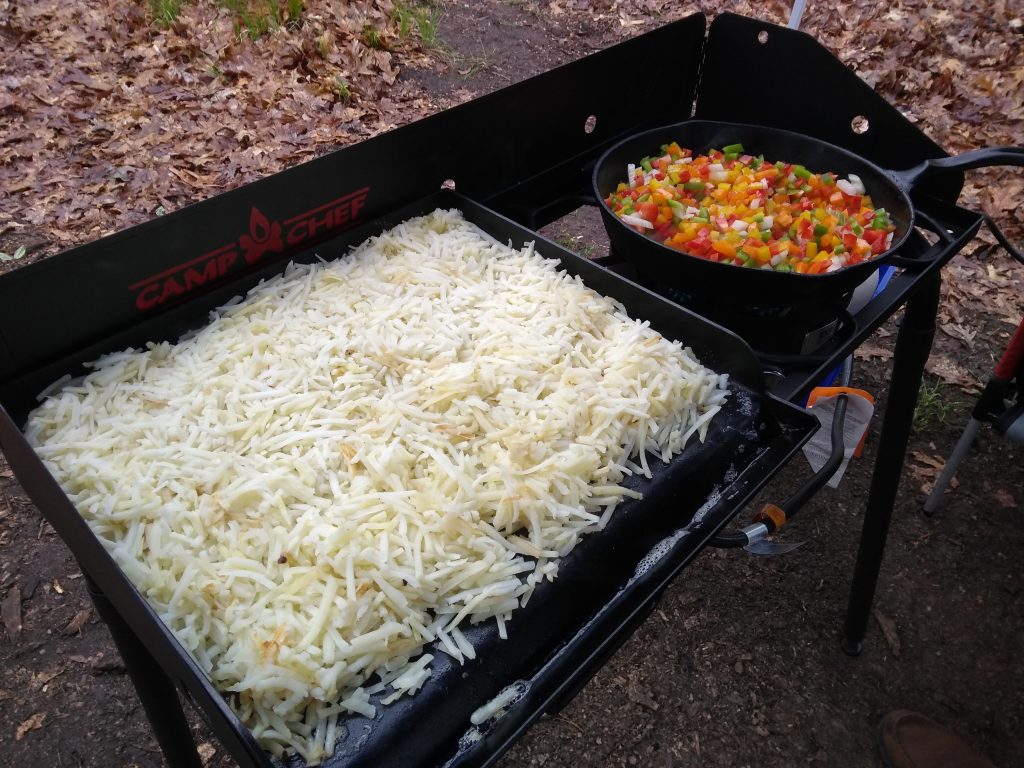 With the professional griddle, you gain cooking surface area too. It’s like using the largest possible pan every time. Pancake, french toast, grilled sandwiches, and more, are easy. A reversible grill griddle also has no stop at the edge, so you need to pay attention to how close to the edge you are with food. Think hashbrowns. We dumped two full bags of frozen hashbrowns on the griddle at one time. Did it touch the edges? Of course, but it didn’t matter. On the reversible, we would have had to limit that to a partial bag to keep it all on the top. Cooking would have taken longer, people would have had to wait for food.
We had a camping weekend coming up for our ScoutsBSA Troop so another adult, Jeff Kelley, and I took on cooking for the adults and a few youth. We made sure to bring enough to share with all the youth camping too.
Our menu for the weekend:
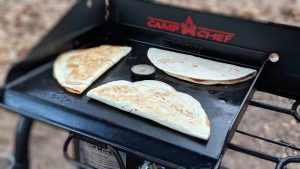
Photo Credit Jeff Kelley
Friday night:
Pizza quesadillas. Following the instructions that came with the griddle, we warmed it up for 5 minutes on medium, then turned it down to medium-low/low. The instructions say start there and go up if needed. Do not use the griddle on high. You don’t need to. Medium is plenty hot and the griddle dispurses the heat more evenly than you’d expect because of the welded disk on the bottom. Once warmed up we covered half of a tortilla in sauce, cheese, and pepperonis, folded them and grilled them. We brought enough to get a feel for the griddle and share with all the scouts.
Saturday morning:
Breakfast burritos: We cut up bacon in a cast iron pan, the sauteed the peppers and onions in the grease. We also scrambled eggs in a non-stick (ceramic) pan. All the while we had hash browns going on the griddle. Once the eggs were done, people could come through the line with their tortilla and load up on what they wanted.
 Saturday lunch:
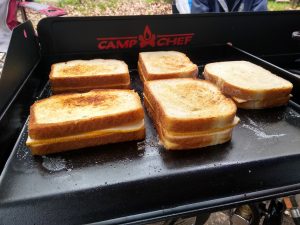
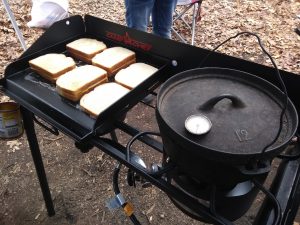
Grilled Cheese (munster on buttered sourdough bread) and Chili. The Explorer Two Burner Stove easily boiled the almost gallon of water for the chili, while we chopped up and browned 2lbs of ground beef on the griddle. The chili was a Bear Creak Package (double batch) and we let it simmer with the meat for the required time while we cleaned the griddle and oiled it up for the grilled cheese sandwiches.
Saturday Dinner:
Around 10 am we took a dutch oven, lined it with foil, put in a bed of celery sticks, then a Mississippi pot roast (5lbs of chuck roast, a pack of Aujus, a package of Ranch mix, and a stick of butter, we skipped the peppers). Then we put it on a burner on low and let it go all through lunch and the afternoon. Low is low, but we put a thermometer on top of the dutch oven to keep track and when it would go above 225-230 degrees we’d shut it off for a while and let it sit. We did pull it off the stove to boil 3 gallons of water for clean up from lunch too. All in all though it sat on low for about 8 hours. We had a touch of wind at one point and it blew out the burner, so it’s not something you want to leave unattended. When we opened up the cast iron pot at just after 6pm, we were rewarded with a perfectly moist pot roast with plenty of liquid. Meaning, low was just right. It didn’t boil everything off like some stoves would have, and nothing was burned to the bottom of the pot OR the foil we used. We probably didn’t even need the foil. Another note is we used a dutch oven with legs, not a flat one. The open design of the stove allowed the legs of the oven to fit just fine.
 Saturday dessert:
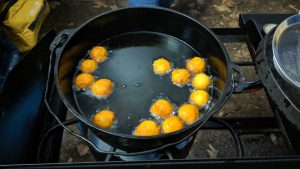
Donut holes. We took the dutch oven from dinner and half filled it with oil and set it on the stove at medium. That was our first mistake. Medium was way too hot for the oil in just a few minutes. Like I said, we haven’t worked with a stove this powerful before. Once we got it cooled down we kept it on low and kept the donut holes going and that was the perfect temperature. We should have brought an oil thermometer with us but didn’t pack one. For the actual donut holes we used biscuits in a tube cut into 4 piece and hand rolled under hard pressure. Once out of the oil, we let them drip/drain, then put the in a paper bag with powdered sugar. We made 3 cans, 10 biscuits per can, 4 holes per biscuit is 40 holes per can for 120 donut holes total. We shared with all the scouts and they didn’t last very long.
Sunday morning:
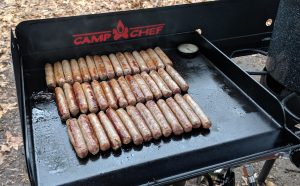
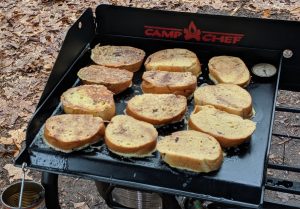
French toast and sausage. We prepared the sausage on the griddle, then shuffled that into the camp chef deluxe oven to keep it warm. Next we made an egg mixture and hand-cut some Italian bread. The size of the grilled allows a lot of food to be cooked quickly. (Photos by Jeff Kelley)
 Sunday lunch:
We wanted to pack up by noon when the parents come to pick up the scouts but we still wanted a hot lunch so around 10 am we dumped three and a half pounds of shredded beef on the griddle and covered it with an au jus packet. While that was cooking we split open a bunch of hoagie rolls and inserted provolone cheese. When the beef was ready was ready we put a spatula full per sandwich and wrapped them up in aluminum foil to sit until we were ready to go. The heat melted the cheese and they were kept warm until we left. If it had been cold out, we could have put them in an empty cooler to insulate them and keep more heat in.
Clean up:
Every time we used the griddle we took the time to scrape it, wash it, and re oil it. At almost 20lbs the positives are that it holds heat and is really even. The negative is, it holds heat and it takes a while to cool down. The nice part is it has a handle on it. So if you needed to take if off the stove to cook something else and use both burners you can. On the front of the griddle is a drip edge that feeds to the left. Camp Chef provides a wire basket that holds a standard can, that’s what we used all weekend. They also sell a grease tray that hangs from the front of the griddle, but that just adds one more thing to be cleaned, where as the can, we just threw away.
Versatility
By this point I hope you understand I’m really happy with the Explorer Two Burner Stove, but versatility is where the Explorer really shines. It can become almost anything.
It starts out as two fantastic burners on which you can place any normal kitchen pan, or cast iron, and then you can add:
- Leg Levelers to make it sit flat on uneven ground. (I did)
- Stove Ignitors so you don’t need lighters or a match (I didn’t)
- A griddle:
- Reversible Grill/Griddle good for steaks and burgers, pancakes and sandwiches OR
- Universal Flat Top Griddle good for pancakes, sandwiches, hash browns OR
- Professional Flat Top Griddle 30, good for ANYTHING you want to cook. covers one half of the stove OR
- Professional Flat Top Griddle 60, Good for TWICE the amount of ANYTHING you throw at the 30. It covers BOTH burners.
- Did I hear you say that you want to Grill? with the ability to smoke? How about one of these:
- Deluxe BBQ Grill Box 30 to grill stuff, covers one burner. OR
- Deluxe BBQ Grill Box 60 grill TWICE the stuff of the 30, this one covers two burners OR
- BBQ Grill Box 100 covers only 1 burner, but has a bit more height inside, no temp gauge but has a variable vent.
- Still not enough? How about Pizza. (or other things cooked in a pizza oven?)
- Artisan Pizza Oven 60 covers 2 burners and is like cooking in a traditional brick oven.
Beyond that, they sell a carry bag, a rolling carry bag, spatulas (which I also bought and am very happy with), scrapers, side tables, and grill covers. The Explorer series wins big for Versatility.
Value
 At full price, $139, the Explorer Two Burner Stove is a great value, on Amazon and at Dick’s Sporting Goods I’ve seen it for $99 and at that price you need to pick it up. After completing my testing we found it online at Cabela’s for $79 and that isn’t just a deal, it is a steal. As I mentioned earlier I was considering a reversible grill griddle, but I’m glad I got an opportunity to step up to the professional griddle. It made all the difference. The reversible grill griddle sells from Camp Chef for $39. We found the Professional Griddle on Amazon for $47, easily worth the $8 upgrade. Once we had the stove to review I knew I would want the leg levelers, and I needed new spatulas so at $19.99 ($16 on Amazon) I picked up a set from Camp Chef and they are serious quality especially at that price. Pick up a set for sure. We liked using the Explorer Two Burner Stove so much, that at the end of the weekend we decided to buy 4 stoves, 4 sets of leg levels, 4 professional griddles, and 4 spatula sets for the scout troop. Using the deal at Cabela’s for the stove and Amazon for everything else, we spend around $680 including tax. Depending on how many people I feed, I’ll be bringing this or the Camp Chef Deluxe Oven on future camping trips. Maybe both.
Buy Now: $99 – $139 (Camp Chef | Amazon | Cabela’s) or learn more at CampChef.com
- 30,000 BTU per burner
- Total control of flame size
- Ruggid, solid construction, built to last.
- The leg and windscreen storage bag is too thin.
- Not including the leg levelers to begin with.


Leave a Reply